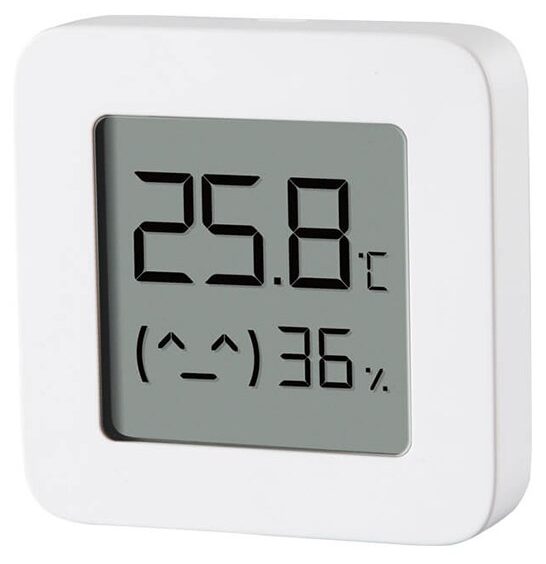
On some light linux environement running busybox or openWRT you will notice that you don’t have access to the $RANDOM variable , the date command is also incomplete so you can’t use the tail of the nanosecond date to have a random number.
.
Using this command you will get a random number beetween 0 and 69. if you wish to change the range of the random numbers , just edit the regex in the grep part
awk is a extremely powerful tool !
i’m always surprised how much you can do with it.
My latest finding is pretty amazing.
Lets say you have a list of numbers , and you want to figure out the bigger number , the lower number , and the average of all the numbers in the list.
you can use the following awk code to print minimum, maximum and average.
The output is going to be : avg 32.93 | max 100.1 | min 1.5
Grafana is a wonderful tool to display time series ans a lot of different metrics
The project is in a very active development state , and new features are added constantly.
The version 5 is particularly desirable since a new layout engine for the dashboard has been developed, and is quite powerfull !
So to update your install of Grafana from 4 to 5 you need to launch several command with root or a privileged user.
The service should automaticly restart when the update is done , but check that it is running with :
service grafana-server status
You should see something like this
? grafana-server.service – Grafana instance Loaded: loaded (/usr/lib/systemd/system/grafana-server.service; disabled) Active: active (running) since ven. 2018-04-20 17:47:41 CEST; 1 day 22h ago
If you use a Linux box to display some infos in a public space , you might not have the possibility to connect a mouse and keyboard every time you need to click on the page.
For example, at work we use a TV to display some metrics with grafana,
Sometime, when we reboot the machine , the identification cookie will be outdated and the browser will land on the authentication page instead.
Since the machine has no keyboard and mousse attached this cause some issues , .
So I’ve used the tool xdotool that allow a privileged ssh user or a script to interact with the mouse and keyboard
An important step is to select the screen on witch you want to send mouses clicks and keystrokes.
After that lets say your screen is displaying a full-screen browser with a login page ,
By default the cursor is already in the login form.
for the example , the login/password are going to be admin/admin
When you are spending your day in the terminal , you will find that navigating using only the arrows keys although fine at the the start will frustrate you because it’s quite slow.
Bash come with a lot of keyboard shortcuts design to gain precious time.
CTRL+A # will move the cursour to the beginning of the line
CTRL+E # moves to end of line CTRL+C # halts the current command and back to prompt
CTRL+D # deletes one character backward or logs out of current session, similar to exit CTRL+K # deletes all the text forward to the end of the line CTRL+L # clears screen and redisplay the line CTRL+R # searches history entering keyword ,
CTRL+T # transposes two characters CTRL+U # kills backward from point to the beginning of line CTRL+W # kills the word behind the cursor
i’ve put in bold the shortcuts that i use every day , i don’t use CTRL+A and CTRL+E because the keyboard has keys that are foing the same thing.
il you need to run a script unattended and wish to log the output of that script you must already know that you can simply do
the problem with that is you will not log the error messages , only the output messages ,
the error are going to be displayed on the terminal but , not logged
and the error message are often as important as the output message , we do not want to dismiss them from the log ,
the solution to that issue is to run the script using this
With this , both the output will be logged in to the log file.
As you know if you own the orange pi zero, the board run very hot. Running it without an heat sink is not really possible if your board is doing anything other than idling
and even with an heatsink you will encounter throttling if your application is a little intensive.
In an other article I managed to get a fan running controlled by the gpio’s.
A cron check every minute the cpu temperature, if it’s above a set temperature, the fan turn on.
If it’s under, the fan turns off.
The first time I did that project it was on my first orange pi zero. I made some mistakes in my wiring and, because of that, the fan only received 2.5v, it was spinning very slowly, and I was obliged to do some bash trickery to get the fan to start.
My original orangepi zero was lost during an apartment change.
I decided to order a new one and this time, I wanted to do the best work I could to integrate the fan and heatsink.
I found an acrylic case for the orange pi zero on aliexpress.
And after receiving my orange pi zero, I saw the board was a new revision, it was running even hotter than my previous orange pi zero.
Few days after receiving the board, the case arrived. It was very pretty but it was blocking any air circulation. And the heatsink had no medium to dissipate the heat since the air was hot and not circulating around the metal.
The CPU temperature rapidly ascended to 80°c.
I own several old fans disassembled from old graphics card, and one of the small fans was just the perfect size. I cut a circular hole in the top acrylic plate so the air from the fan could enter and go trough the radiator fins. The air should after exit from a void in a face of the case were optional usb port are placed.
How to use that fan?
The problem with gpio’s is that they only push very weak current and volts (3.3v). You cannot run a fan directly from a gpio.
But you can use a gpio to control an electronic switch (a transistor) that will be able to run the fan
You should use a npn transistor. They are the most common and cost next to nothing. You will find them for free when you tear down old broken power supply.
To turn on and off your switch, you just have to send 1 or 0 on it’s base.
A great way to control the gpio’s of the opi zero is with the help of that library called WiringPI
you will find instructions on how to install the library on the github page.
after installation lauch the command gpio readall
i chose the gpio.7 to control my fan ,
conveniently the gpio 7 is placed in the 7th place on the board , and his wPi alias is also 7
as you can see in the attached capture it’s not always the case !
i then solder my fan and transistor following this diagram :
To continue , i must write a script that check for the cpu temperature , and activate the fan if the cpu temperature is above a certain set threshold.
then , using crontab , set this script to launch every minutes.
add the line * * * * * /root/fan-control.sh to your cron jobs , using the command crontab -e
thanks to this script your fan should automatically launch when your Orange is charged , and stop when it’s return to idling.